Support: +44 2031 293 603
support@evisa.express

Uganda eVisa Photo Background

Complete guide to Uganda eVisa photo background requirements. Learn about white background standards, lighting techniques, shadow elimination, and how to create the perfect backdrop for your visa photo.

White background photo studio setup

Uganda eVisa Photo Background Requirements

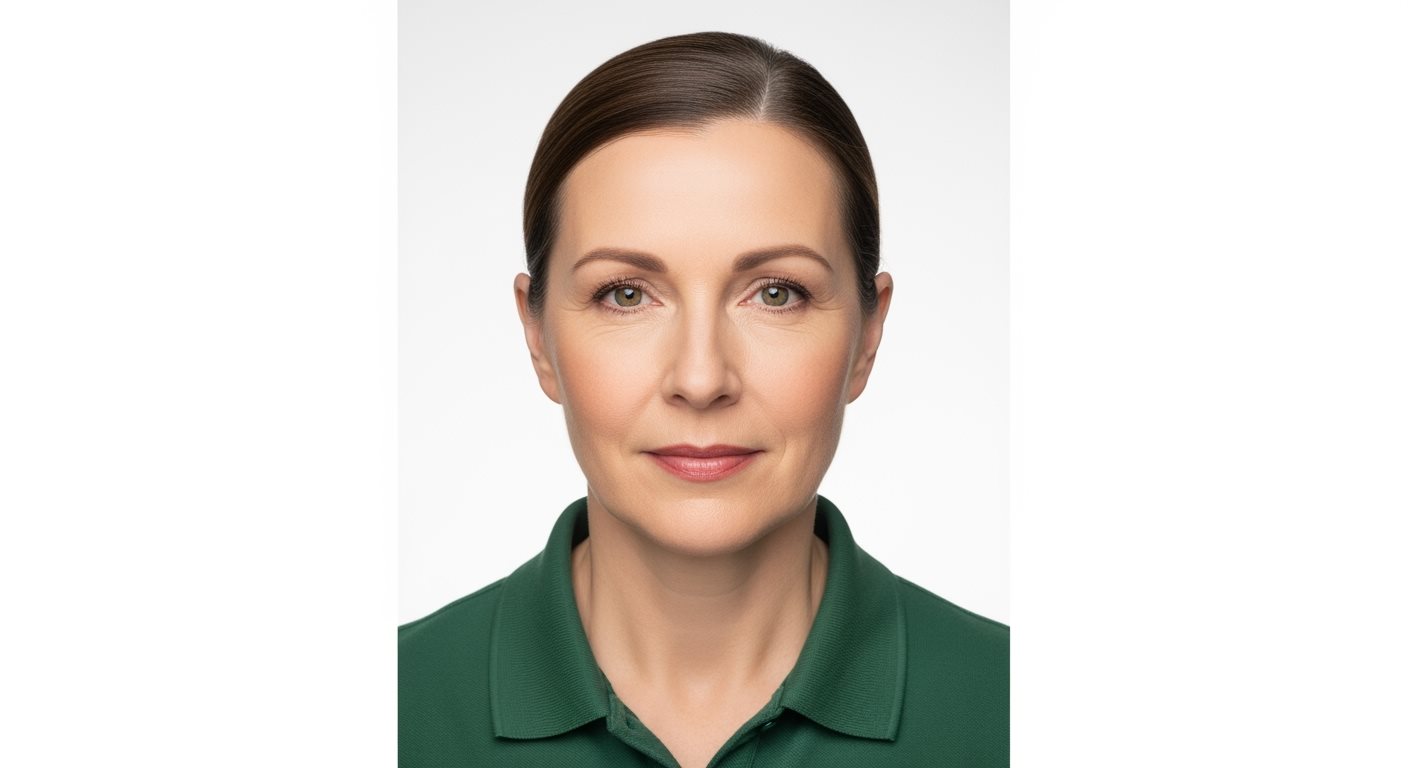
The background of your Uganda eVisa photo is critical for application approval. A proper white background ensures your photo meets international passport photo standards and allows immigration officials to clearly verify your identity. Incorrect backgrounds are one of the leading causes of visa photo rejection.

Critical Background Requirements
  • Plain white background: Pure white (#FFFFFF) or off-white only
  • No patterns or textures: Completely smooth and uniform
  • No shadows: Even lighting with no visible shadows
  • No objects: Nothing visible in background except plain surface
  • Consistent color: Uniform white throughout entire background

Acceptable Background Types

Pure White

Preferred
Characteristics:
  • RGB: 255, 255, 255
  • Hex: #FFFFFF
  • Completely neutral
  • Maximum contrast with subject
  • Professional appearance
Best For:
  • All skin tones
  • Professional photography
  • Digital applications
  • International standards

Off-White

Acceptable
Characteristics:
  • Very light cream or ivory
  • Minimal color tint
  • Still appears white
  • Good contrast maintained
  • Natural appearance
Considerations:
  • Must be very light
  • No yellow or gray tints
  • Should appear white in photo
  • Test with different lighting

Light Gray

Conditional
Characteristics:
  • Very light gray only
  • Minimal contrast difference
  • Must appear nearly white
  • Uniform throughout
  • No texture visible
Requirements:
  • Extremely light shade only
  • Good lighting essential
  • May need color correction
  • Risk of rejection if too dark

Unacceptable Backgrounds

Photo background comparison showing correct and incorrect examples

Backgrounds That Will Cause Rejection

Colored Backgrounds
  • Blue, red, green, or any color
  • Pastel colors
  • Tinted backgrounds
  • Gradient backgrounds
Patterned Backgrounds
  • Wallpaper or decorative patterns
  • Textured surfaces
  • Fabric or clothing backgrounds
  • Geometric patterns
Objects in Background
  • Furniture or decorations
  • Other people
  • Windows or doors
  • Any visible objects
Shadow Problems
  • Visible shadows on background
  • Uneven lighting
  • Dark spots or areas
  • Harsh lighting contrasts

Creating the Perfect White Background

DIY Background Setup Options

DIY home photo setup with white background

Setup Methods

White Wall
  • Use clean, plain white wall
  • Ensure wall is smooth and clean
  • Check for shadows or marks
  • Position 2-3 feet from wall
White Sheet/Fabric
  • Hang clean white sheet
  • Ensure fabric is wrinkle-free
  • Use clips to secure edges
  • Iron if necessary for smoothness
Poster Board/Foam Core
  • Large white poster board
  • Foam core board for stiffness
  • Position behind subject
  • Ensure board is large enough
Professional Backdrop
  • Photography backdrop paper
  • Seamless white background
  • Professional appearance
  • Reusable for multiple photos

Lighting for Perfect Background

Achieving Even, Shadow-Free Lighting

Natural Lighting Setup
1
Window Light

Position near large window with soft, diffused daylight. Avoid direct sunlight.

2
Subject Position

Face the window with background behind you. Light should illuminate face evenly.

3
Background Distance

Stand 2-3 feet from background to minimize shadows on the backdrop.

4
Time of Day

Shoot during midday for most even, soft natural light conditions.

Artificial Lighting Setup
1
Main Light

Use soft, diffused light source in front of subject. Avoid harsh direct lighting.

2
Background Light

Optional: Add light behind subject to illuminate background evenly.

3
Fill Light

Use reflector or second light to fill shadows and create even illumination.

4
Light Quality

Ensure all lights are same color temperature (daylight or tungsten).

Common Background Problems and Solutions

Problem Cause Solution Prevention
Shadows on background Too close to background or harsh lighting Move further from background, use softer lighting Position 2-3 feet from backdrop
Colored or tinted background Wrong background color or lighting Use pure white background, adjust white balance Test background color in different lighting
Uneven background lighting Poor lighting setup Add background lighting or use larger light source Use diffused, even lighting
Visible texture or patterns Wrong background material Use smooth, plain white surface Choose appropriate background material
Objects visible in background Insufficient background coverage Use larger background or change position Ensure background covers entire frame
Background appears gray Underexposed or poor lighting Increase lighting or adjust camera exposure Use adequate lighting for white background

Background Quality Assessment

How to Check Your Background Quality

Visual Inspection Checklist
Color Uniformity

Background should be consistently white throughout with no color variations.

Shadow Detection

Look carefully for any shadows, especially around head and shoulders area.

Contrast Check

Ensure good contrast between subject and background for clear definition.

Coverage Verification

Background should fill entire frame with no edges or objects visible.

Technical Analysis
Color Values

Use photo editing software to check RGB values. Should be close to 255,255,255.

Histogram Analysis

Background should show peak at right side of histogram (bright values).

Auto-Selection Test

Use magic wand tool to select background. Should select uniformly.

Print Preview

Check how background appears when printed to ensure it remains white.

Background Editing and Correction

Post-Processing Background Improvements

Acceptable Editing
Background cleanup: Remove minor spots or imperfections
Brightness adjustment: Lighten slightly dark backgrounds
Color correction: Remove slight color tints
Shadow reduction: Minimize minor shadows
Prohibited Editing
Background replacement: Completely changing background
Heavy manipulation: Extensive digital alterations
Artificial backgrounds: Adding digital backgrounds
Object removal: Removing large objects from background

Professional vs DIY Background

Professional Studio

Background Advantages:
  • Perfect white seamless background
  • Professional lighting setup
  • No shadows or imperfections
  • Consistent results guaranteed
  • Proper equipment and expertise
Quality Features:
  • Seamless paper backgrounds
  • Multiple light sources
  • Shadow elimination techniques
  • Color-accurate lighting

DIY Home Setup

Background Considerations:
  • Requires careful setup and planning
  • Need proper background materials
  • Lighting challenges to overcome
  • May need multiple attempts
  • Potential for shadows and imperfections
Success Requirements:
  • Quality white background material
  • Good lighting setup
  • Proper distance from background
  • Understanding of requirements

Background Verification Checklist

Before Submitting Your Photo

Background Quality
Lighting and Shadows
Pro Tips for Perfect Background
  • Test your setup: Take test photos to check background quality
  • Use proper distance: Stand 2-3 feet from background to avoid shadows
  • Check lighting: Ensure even, soft lighting on both subject and background
  • Keep it simple: Plain white wall or sheet often works best
  • Avoid shortcuts: Don't try to fix poor backgrounds with heavy editing
  • Multiple shots: Take several photos with different lighting setups
Important Background Reminders
  • White background mandatory: No other colors accepted
  • No patterns allowed: Even subtle textures can cause rejection
  • Shadows cause rejection: Ensure shadow-free background
  • Objects not permitted: Background must be completely clear
  • Quality matters: Poor backgrounds are easily detected and rejected

Frequently Asked Questions

Uganda eVisa photos must have a plain white or off-white background. Pure white (#FFFFFF) is preferred. No other colors are acceptable, including blue, gray, or any colored backgrounds. The background must be uniform and completely plain without patterns, textures, or objects.

No, colored backgrounds are not acceptable for Uganda eVisa photos. This includes blue, red, green, or any other colored backgrounds commonly used for other types of photos. Only plain white or off-white backgrounds meet the requirements and will be accepted by the visa processing system.

To avoid shadows: 1) Stand 2-3 feet away from the background, 2) Use soft, diffused lighting from multiple angles, 3) Position lights to illuminate both you and the background evenly, 4) Use natural window light when possible, 5) Avoid harsh direct lighting that creates strong shadows.

Yes, a clean, plain white wall can work well as a background for your Uganda eVisa photo. Ensure the wall is smooth, clean, and free from marks, shadows, or texture. Position yourself 2-3 feet from the wall and use proper lighting to avoid casting shadows on the background.

If your white background appears gray, it's likely due to insufficient lighting or incorrect camera exposure. Increase the lighting on the background, adjust your camera's exposure settings, or move to a brighter location. The background should appear bright white in the final photo, not gray.

Minor background editing is acceptable, such as cleaning up small spots, adjusting brightness, or removing slight color tints. However, completely replacing the background or heavy digital manipulation is not recommended and may be detected. It's better to take the photo with a proper white background from the start.

You can use: white bed sheets (wrinkle-free), white poster board or foam core, photography backdrop paper, or a clean white wall. Ensure the material is large enough to fill the frame, smooth without texture, and properly lit to appear pure white in the photo.

Patterned backgrounds can interfere with facial recognition technology, distract from the subject, and don't meet international passport photo standards. Plain white backgrounds provide maximum contrast, ensure clear subject definition, and maintain consistency with global visa photo requirements.

Take test photos and check: 1) Background appears pure white, 2) No shadows visible, 3) No patterns or textures, 4) Good contrast with your clothing, 5) Uniform color throughout. You can also use photo editing software to analyze the background's color values and uniformity.

If your photo background doesn't meet requirements, your Uganda eVisa application may be rejected or delayed. You'll need to submit a new photo with a proper white background and may face additional processing fees. It's essential to ensure background compliance before submitting your application.